

These instructions are for the US spec Giulia QV 2.9 liter and the US spec 2.0 liter Stelvio.
Installation is not too difficult, it's harder than an oil change, but easier than an exhaust system. You will need to jack up the car to remove the passenger side front wheel. The car must be well supported with the wheels blocked and the parking brake on because you will be working with it jacked up for a bit of time.
These instructions including all of the photos are based on the Giulia QV installation. The steps for the Stelvio 2.0 are the same, although the installation is easier on the Stelvio because there is more room to work.
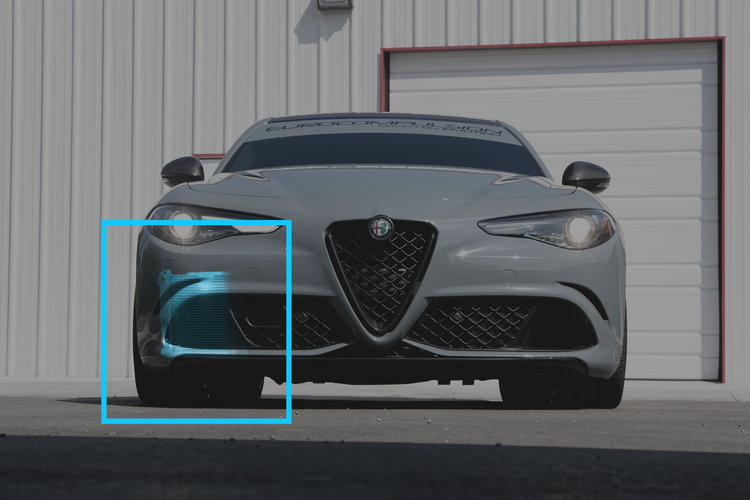
Step 1. Remove the passenger side front wheel.

Step 2. Remove the forward inner fender lining. It's held on primarily by two nuts, their locations are shown by the white arrows. Additionally, there are a number of Phillips screws which secure the fender liner as well as one push tab which can be popped out with a flat head screwdriver. There is one screw that's quite easy to miss as it's not visible in the wheel well area. It's under the car and screws in an upward direction into the far right (car's right) corner of the fender liner.

Step 3. Now that we have access to the factory heat exchanger, it's time to remove it. There is quite a bit to do here.

In order to minimize coolant loss I like to pinch the two lines going to the heat exchanger. You don't have to do this, but if you don't you will have to drain all the coolant in the intercooling system, and these cars require special coolant to preserve the sealants and glues used in the factory parts. (note: the Eurocompulsion heat exchanger is compatible with any automotive coolant ever made, however your car still has factory parts that require the specific coolant specified by Alfa Romeo).

Next, we need to disconnect the factory heat exchanger. I suggest doing this in the following order.

First, drain the coolant. Note that you can do this very neatly by putting a hose on the fitting below the drain knob. Once you do that, just turn the knob and the coolant will flow out into your container. If you use a nice clean container you can even reuse the fluid as long as it looks clean. If you pinched off the lines very little coolant will be drained, only the volume that's in the factory heat exchanger itself.
Next, (2 and 3 in the picture above) disconnect the two coolant lines. On the bottom side of each connector is a gap in the metal securing clip. That gap allows you to put a screwdriver in there to pull the clip down. Once it's down far enough the connector will pull free of the heat exchanger pretty easily. You should not need a lot of force here, if you do, the clip probably isn't down far enough.
Arrow 4 in the picture above points to an electrical connection. It need to be unplugged by sliding back the grey colored securing clip. It just slides out then it will unplug. The male end, which has the clip can stay put. However the female end is attached to the car and must be pried free. Also the wiring from the female end had to be freed up. This picture shows the wiring. Note that the heat exchanger is already removed in this picture, I'm just trying to give you a picture of what the wiring should look like once disconnected.

The last thing to disconnect is at arrow 5 which is the main bracket. This is attached to the heat exchanger by two bolts, and to the car by two nuts. Remove all four and you can pull the bracket out of the car.
Now you can remove the heat exchanger. It needs to move forward and up before it will come out. Once it's out, this is what you should be looking at:

Step 4. With the factory heat exchanger out of the car, you need to remove the plastic shroud and the metal grill. Both are attached to the heat exchanger via these four “bolts”.

As these are not true bolts so we won't be reusing them, but we will be using the plastic shroud and metal grill. Both of these parts are essential to the system. Pictured below is the metal grill, you may be tempted to leave this part off, but don't do that, it's essential for proper airflow as it prevents large quantities of air from escaping around the side of the core. It does have some metal tabs, two of which will have to be bent as in the picture below. Notice that the two tabs in the bottom of the picture are bent so they are opposite of the two at the top. It will be obvious why you have to do this when you put it all together.

Step 5. The Eurocompulsion heat exchanger is much larger than the factory unit, nominally twice as large. Most of that extra size is in core thickness, but it has to fit into the same space occupied by the factory unit. All of the additional size is in the forward direction, thus there isn't enough space for the factory plastic shroud without trimming it a bit, so that's what we have to do.
If you take your time you can do this so well that it's indistinguishable from stock once it's all assembled, and this isn't too difficult to do. My point is that this is the step where you really want to take your time. Eurocompulsion does stock replacement OEM shrouds but you really shouldn't need one.
It's time to trim the shroud. You are going to need to trim off about 1 inch of material from the front all the way around, meaning almost all of the softer rubbery stuff and some of the plastic. Either a good pair of scissors or a Dremel works pretty well here, I prefer scissors.
You will have to test fit it and probably make some minor changes a few times. I suggest putting a protective layer of tape on the back side of the heat exchanger. This is also a good time to make sure the screw type fittings on the heat exchanger are tight, we don't want any leaks.
The brake rotor and caliper on the Giulia QV are so large that they tend to be in the way during installation. Keep in mind that some bent cooling fins from installation will have a negligible effect of the heat exchanger's performance but it's still good to try to keep them nice.
Test fit the shroud and grill to make sure they can meet up to the bumper cover properly. On the QV some extra trimming is needed because of the electric motor that powers the front chin spoiler.

Once you think the trimming is about right, it is time to move forwards. If working on a Stelvio 2.0 you can now attach the grill and shroud to the new heat exchanger. If working on Giulia QV you can not install the grill and shroud on the new heat exchanger with it out of the car because the QV's giant brakes get in the way. Turning the steering wheel won't help; you need the wheels pointing straight ahead.
On the QV you have to put the shroud in, then the grill, then put the heat exchanger in and install the included bolts as seen in the picture below. Then you can wrestle it into its final position. I do this by putting the lower locating pin into the grommet in the car and then pivoting the whole thing into position.

Work slowly and carefully here. You may need to take it back out and trim the shroud a few times but it's worth it to get this just right. This is much easier on the Stelvio 2.0 because you can do it with the shroud and grill attached.
Step 6. Now that your new heat exchanger is in position it's time to start connecting it to everything. Start with the bracket at the top. It attaches with the same nuts and bolts as the original and in the exact same way. This bracket IS what supports the weight of the heat exchanger.
Here is a picture of the bracket when out of the car, note I removed the rubber grommets just to clean them, obviously I put them back in as they are important.

Once the heat exchanger is attached, do a final check at the front of the car and make sure it's all lined up, then start attaching the cooling lines and reconnect the electrical connection and re-secure the electrical wires.
At this point, it should look like this:

Step 7. You're about done! Remove the protective tape if you installed it and refill the coolant reservoir. Note that there are two coolant reservoirs under the hoods of these cars, but only one will be low so it should be quite obvious which one you need to fill. It's the one on the driver's side.
Check for leaks and look over everything. Common errors are leaving the drain plug loose or forgetting the electrical plug.

Install the fender liner, put the wheel back on and let the car idle until it's fully warmed up with the intercooler coolant reservoir cap off to insure the system gets all the air out. Then put the cap on and open the bleeder on the coolant line to the turbo (Stelvio 2.0 only), use caution as this will be hot. Let it bleed from there for a short time, 10 seconds or so, just to purge any air bubble at the top of the system.
Close the bleeder and you're done!