
In this thread, we'll be documenting the development and build of our MY2020 Alfa Romeo Stelvio 2.0L.
The purpose of this documentation is to measure any new changes from the change in newest model years, as well as test and measure newest software variants and performance with our standard modifications. Any changes necessary will be made to accommodate or improve for a wider range of vehicles.
We will be starting with a completely stock vehicle, and moving forward with each change and test, documenting along the way. Much of this information will also pertain to the Giulia as well.
Let's start with the vehicle specs:

VEHICLE INFO:
ALFA ROMEO STELVIO
2.0L GME Turbo / MM10JA ECU
Auto transmission / Q4
MY2020


The 2020 model year has a number of nice upgrades, both for the user experience and also aesthetically. I can't say what we will do with the car in regards to suspension, wheels, or aesthetics. Most of what we will start with will revolve around engine performance and power. But mixed in to this will be a great deal of general information also.
STOCK BOOST & THE NEW INFOTAINMENT PERFORMANCE METRICS
When going over the 2020 model, this feature piqued all our interests. The infotainment system now has an available performance widget that can display torque output, oil pressure, boost pressure, and many other things. It also has a monitoring display for the AWD system on the Q4.
We're not 100% sure what all this shows while in action, but here it is (and it may or may not prove to be useful later):

More importantly, we wanted to know if the boost gauge is accurate.
Infotainment Gauge Specs & Behavior:
-Max Available Reading: 29psi (see below)
-Peak Reading at WOT: 25-26psi (displayed)
-Reading Activity: Peaks at 25-26psi, holds from peak boost rpm (about 3200) until 5200-5300rpm, then begins to steadily drop until redline.

To verify how accurate this reading was on the stock vehicle, we installed our plug and play boost gauge setup on the Stelvio. This is the standard gauge we use on all Alfas. It is plug and play because it plugs directly into the MAP sensor on the manifold, and delivers pressure signal from the sensor reading boost directly to the gauge in the car. This eliminates the need for tubing or hoses, and retrieves boost data directly from the source.
It comes in both 30psi and 45psi variants. Later on in this thread we will cover how it is installed and what features it contains (and where you can get it for both the 2.0L and 2.9L), but for now we are just viewing the boost reading for the sake of comparison.

Boost Gauge Specs & Behavior:
-Max Available Reading: 45psi (see below)
-Peak Reading at WOT: 23-24psi (from gauge)
-Reading Activity: Peaks at 23-24psi, holds from peak boost rpm (about 3200) until 5200-5300rpm, then begins to steadily drop until redline.
On average, the Vaitrix PNP Boost Gauge connected at the manifold (via MAP sensor) showed a constant (2)psi less than the Infotainment gauge across the powerband/rpm range.
Without a wiring diagram we may not know for sure, but we believe the cause of this difference in reading is directly from where the Infotainment boost gauge is taking the reading from. Like previous FCA vehicles equipped with boost gauges (whether analog or digital in appearance), most will take boost reading from the boost pressure sensor, not the MAP sensor.
The boost pressure sensor is located on the charge pipe, before the throttle body. The MAP sensor is located after the throttle body, on the manifold. It's normal to see a slightly higher number prior to the throttle for boost, and given FCA has taken boost from this location in the past, we're going to assume this is the case after observing boost behavior.
Moving forward, be aware of this difference when viewing boost while driving for newer owners. With an ECU tune, this number will still be somewhat accurate (likely with a +1-2psi margin). However, on a piggyback this number may not reflect closely what your real boost pressure is (another reason why a boost gauge is a good idea).
SGW MODULE LOCATION & CHANGE:
Before tuning the car, we began to prepare for the installation of a bypass plug for the SGW module undoubtedly still equipped on the vehicle.
Spoiler alert, it's not in either of the two original places it was on previous model years. In fact, it's almost as if it was moved on purpose (in order to make it more difficult to reach). We have not confirmed yet this to be the location also on the 2020 Giulia, but it is likely that it also moved.
The module is not placed on the back of a welded bracket, directly behind the steering column.
The best way to get to it is to take off the lower shrouding of the steering wheel and column (held on by 2 simple screws). You can then position the steering wheel upwards so as to reach your arm in at its fullest. Your hand must go in, back, and to the left.

The module is held onto the bracket by (3) nuts. The left hand side nut is almost impossible to get a socket on. The other (2) on the right hand side can be reached. These must be loosened and removed. The third nut is loose enough that the SGW module can pivot back and forth. After the right hand side nuts are removed you can lift the module off the prongs and pivot upwards.
The plugs on the module are pointed downwards, but the space is too small to grip the plugs and pull down to disconnect them. With the module pivoted, you can reach the plugs from the right hand side and easily disconnect.

We will have step by step instructions in the future to walk users through doing this (with more pictures as well). We will be using a new bypass module that will allow for all OBDII operations, not just tuning operations (as this thing is a pain to get to and you don't want to do it twice if not necessary).
Next, we'll be posting stock acceleration data retrieved by Dragy. This includes 0-60mph, 40-100mph, and 1/4 mile times with ET. These passes have already been made, I just have to go through them and post them next week.
Shortly after this we will be testing the car on the dyno to get some stock power numbers, as well as look at the stock boost, fuel, and timing curve.
STOCK ACCELERATION TIMES:
So, here are the stock Dragy times for the Stelvio. This is a Q4, MY2020. This is one of the few times that I was able to match magazine times with the stock car (at least what I was able to find for this specific model and year).
The method of launching was simple. Brake boost to 2500rpm, and go. All of these runs were done in auto shifting mode, and Dynamic. Again, my custom 40-100 runs won't display for some reason, but you can see the times for comparison sake. These were timed during the full run, I did not start at speed and roll into 40mph. This may or may not affect the times depending on the method, but we will do testing with modifications the same way.
As follows:
0-60mph: 5.98s (5.78s 1ft rollout)
40-100mph: 13.4s
1/4 mile: 14.5s @ 94.3 mph

THE INTAKE SYSTEM & THE DREADED P1CEA (AND ALL OTHER THINGS EVAP)
One common issue has been the re-occurring P1CEA code associated with the venturi system on the stock intake, which has to be replicated on all aftermarket intake systems (otherwise the aforementioned code appears).
Since the W05 recall, we have seen a spike in occurrences of this code, even with the proper venturi in place on our intake systems. This indicates an increased sensitivity to the air pressure drop threshold created by the venturi allowed by the ECU and other systems on the car.
We'd like to document this further, so we are currently testing pressure drop in the original Giulia air box versus the newer airbox (just to make sure there are no tapers or changes in the venturi itself).
We are also running an aftermarket venturi on the Stelvio at this moment (about 100 miles in with no CEL) just to see at what moment and conditions the code appears. I am in the process of developing a tuning fix for Euro+Drive customers that will solve this, but you will have to have access to our tuning files in order to utilize this (a reason why we need to understand the hardware fixes).
Tomorrow, I will post more information on this, as well as some photos of the stock intake manifold and intercooler system. We are developing a core upgrade for the stock unit, and I'll share some pictures of this system off the car so you can see how it works and what it looks like (and also what a replacement will look like).
THE INTAKE SYSTEM & THE DREADED P1CEA (AND ALL OTHER THINGS EVAP) (UPDATE)
This morning the Stelvio racked up about 100 more miles, and still no P1CEA. Slightly disappointed, as I was hoping it would appear after 200miles on the aftermarket venturi.
For most this re-design has worked, although we still have a hand full of people who it doesn't work for, which is what we are trying to sort out. We'll continue driving and see what happens.
2.0L INTAKE MANIFOLD & L/A INTERCOOLER

The intake manifold on the 2.0L GME houses the intercooler, which is fed coolant from a heat exchanging system further up the line. Air comes in through the throttle, loops through the IC core, and then into the engine.
Below is the intercooler itself, which slides into the intake manifold almost like a cartridge.

Already, you may see something wrong. The coolant does not have passages that circulate through the entire core, or enter on an inlet and exit the opposite side of the core.
Instead, it only cools one side of the core, and hopes to spread that temperature drop or effect across the unit. As a result, the fins are incredibly dense, so that the core can trap every air molecule possible.

We will be tapping an actual probe to the intercooler plate to get real temp data in order to measure the cooling affect of this core. We've already started designing a core replacement that will allow coolant to pass through the entire body of the core, and increase slightly in core volume as well.
The issue is installation. Without increasing the core size too much, but improving the actual cooling affect, we may gain benefits and power without requiring an end user to remove anything except for the core itself from the manifold. It should be accessible for installation without removing the manifold. But we'll see how effective the improvements are. I doubt anyone wants to remove the intake manifold to install this! The plate and end tanks will have to be designed anyway, but if we make the core too big, you will not be able to remove it from the passenger side of the car where it faces.
Some other observations showed there was quite a bit of oil in the core as well when we removed it. There's evidence of oil singe in some places on the core. I'm not sure if this warrants a catch can to be used on this car (not something we've noticed to be a necessity just yet) but that is also something we are going to explore.
Here are some more photos of the manifold and core:


Something else this may allow, is increased coolant flow or pump on/off times (something we can manipulate through the tune if the system can support this). This could also increase performance hand in hand.
Next week we'll be putting the Stelvio on the dyno to gather stock data and results. I'll post them here when able, I'd like to have runs for each mode of the DNA system as well for comparison.

CUT OPEN: The Intercooler
Now that more of our other cores and fab pieces have come in, Greg was able to have a go at cutting our core open to examine.
As many of you expected, the small fin like pieces do in fact have coolant running through them, but not without some caveats.
The channels are very,very small. Our replacement core in comparison adds a huge amount of cooling volume compared to stock.
Also, there are some divisions or dividers in the fluid channels (you can't really see them because we cut them away, but they are there). Not sure why as it's all flowing to the same location, but we're going to investigate more.
We will be doing some efficiency testing with the stock core side by side with what we have so far as a replacement core. I don't doubt that the stock core can do the job, but that doesn't mean there's nothing left on the table (in our opinion, there is).

P1CEA / EVAP PERFORMANCE UPDATE:
Hardware Fix:
The Stelvio was hijacked for week long venturi testing, so we didn't make it on to the dyno to finish stock data and runs this week.
However, for those who find evaporative emissions riveting, we did test and find some interesting information.
The issue with the P1CEA code and our venturi only happens at a very specific time, and that's at very low boost 1-3psi area. Any other time, the venturi matches factory exactly. It's only at this point that the venturi begins to create less than half the pressure drop that the factory venturi creates. The actual pressure drop data is very low, so we're in the realm of being 100ths off.
But after the latest software update, it would appear that discrepancy is just enough to throw a red flag.
We're in the process of modeling a hardware fix (so far all of our prototypes have eventually thrown a CEL).
Software Fix:
This is an area in which we have had success. So far, my software fix has yet to cause a CEL, even with no venturi installed in the intake system. We've further been able to make adjustments for different kinds of venturis as well.
Testing these parts sometimes takes 200-300 miles, so we trying to make quick progress. I'd like to put a bit more mileage on the Stelvio before we declare the green light to begin sending out software fixes to EURO+DRIVE customers, but I will let everyone know here once that is ready for the end user. So far, so good.
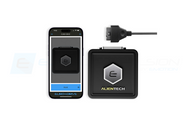
THROTTLE CONTROLLER | EURO+DRIVE FR
We have been testing a new style pedal controller for the 2.0L and 2.9L Alfas. This was born out of attempting to develop with manufacturers our existing units we use for the Jeep Wrangler 2.0L. The pedal connector is the same as the Giulia 2.0L, but programming is not. Thus our existing platforms would not work without causing issues on the Wrangler.
Once being able to get this unit working on the Jeep, we decided to try its hand on the Alfas as well, and it has proven to be a solid result.
Very simple installation, very simple setup, no wiring except what plugs directly into the pedal sensor, and a great deal of settings and modes. We'll be calling it EURO+DRIVE FR (fast response). It is made in Italy (designed by Dimsport).
We should be putting these up for sale in the next week or so (perhaps a video as well).


STOCK DYNO TESTING AND DATA:
The following is data from stock runs on our 2020 Stelvio Q4, 2.0L GME. Runs were done all on the same day, back to back. Month was late June, ambient temperature around 92F.
We will be performing our Dragy runs again in order to coincide with the temperature changes, as the last acceleration times were completed while the temperatures were cooler. In order to acquire accurate data to compare with our tuned times, we want the dyno runs to coincide with the acceleration data.

Run data below consists of some interesting data points and PIDs, including throttle position, air flow, wastegate position, and boost.
More data still to come, and new acceleration data is also coming. Once this is complete, we will begin testing the initial Phase 1 tune.
INITIAL PHASE 1 TUNE ACCELERATION TESTING:
After extensive work on an EVAP system fix for out intake system (which is finally finished and now in production), we were able to get the Phase 1 tune on the car and do some initial testing and acquisition of acceleration data.
The original plan was to re-test acceleration data on the stock tune again, in case of differences in temperature or DA, but the results we got on the stock tune were almost the same as what we achieved before (in fact, our previous results were better). Seeing as the temps were fairly close, kept them as the baseline.
The following are Dragy results for the Stelvio (MY2020) on the Phase 1 tune (car is completely stock, done on 91 octane):
0-60mph: (P1) 5.23s (4.99s 1ft rollout) (STOCK) 5.98s (5.78s 1ft rollout)
40-100mph: (P1) 11.43s (STOCK) 13.4s
1/4 mile: (P1) 13.68s @ 98.37mph (STOCK)14.5s @ 94.3 mph
Results from Dragy are below (due to scrolling on Brandon's phone, we could not get the DA/Temp and the bottom part of the results in the same screen shot, so the second set of images is with the bottom part of the results).

(Results with Bottom shown)

Next up, we will be dyno testing this P1 tune today or tomorrow to see how the dyno results correlate with the real world acceleration results, and go from there.
We are focusing on the deltas seen in contrast to our baselines. When comparing with other results from different locations, it's important to equalize the results with DA corrections (which we have not done above).
Also, as mentioned above, we finally have a prototype that is finished and working successfully for our evap venturi fix on the V2/V1 intakes. We currently have this in mass production. If you're not apart of our mailing list already, please head over to the website and sign up at the bottom of the home page.
We will be sending out an immediate update via that email channel as soon as our production part is available for the public (and can be sent out to anyone that needs it).
Stay tuned for more, we also will have some updates on our intercooler project as well.
UPDATED: VENTURI has been released and is now included in all intake kits. It is also available for those with past or outdated intake kits.
NEW DEVELOPMENTS & UPDATES (09/17/2021)
PHASE 1 TESTING
 We finally had a chance to complete these tests with the Stelvio. Phase 1 testing is above. The testing is beginning as incrementally as we can do so with our own parts and modifications, so there are some developments in regards to the V1 and stock airbox. The previous P1 results were done with the V2 and exhaust already on the car, so this gives a clearer picture into how the modifications are affecting power (and the results from these runs, albeit in the heat of the summer, are lower than the previous ones). We will get to Phase 2 testing once we finish our heat exchanger testing.
- V1 & new high-flow EC drop in filter
As you can see in the above results, we have a stock delta to the V1 and our own new high-flow drop in filter upgrade.
Since the last update we have been designing and also manufacturing our own filters. We've been using these filters on our V2 intakes for all vehicles with great results. Our filter design has strayed away from the typical woven design that most aftermarket filter companies do, as their filtration and protection against water have been generally poor for the sake of performance in some of our applications. We've developed a stretched fabric sheet that allows for increased trapping or particles/dust/moisture, while still allowing excellent flow and durability.
From now on we will be using all of our own filters on new products, and replacing our current offerings as we go along. We will also be doing this for the 2.9L as well (which we currently have a V1 and V2 intake almost ready to release).
- HEAT EXCHANGER UPGRADE


We have designed and fabricated a larger heat exchanger. This heat exchanger fits directly the Stelvio, Stelvio QV, and Giulia QV.
At the moment it is on our Stelvio, and has been for about 1K miles thus far. After monitoring closely the coolant temperatures through the LT system on the stock exchanger, we are now doing the same with our upgrade and seeing great results. After exploring the intercooler upgrade, we realized it would be very cost prohibitive and installation heavy for most customers. After comparing both, the heat exchanger route is going to net good results for less. We will explore the intercooler upgrades after we proceed into turbo upgrades.
We are also working on integration with the Giulia, as the setup is bit different and we want it to be plug and play (and net the same results).
This is currently in the final stages of production. I'll have specs and testing information when this is ready for release.
-V4 AIR INTAKE UPGRADE

The prototype for our completely sealed high flow air intake (the V4 intake) has been finished and the housing is now in production.
Along with the filter housing itself, we have also custom made an entirely new ram/fresh air duct that connects and seals the filter to the front of the car.
The filter is also custom designed and is in production at the moment. The advantage of this filter design over other enclosed box offerings is, well simply put, it's huge and is incredibly high flow. We designed the sizing so that it fills up the entire length of the housing.

We will have specs, testing information and more when released. This is currently in production. One great thing about this kit is that it will be modular with existing V1 and V2 owners. Like the V2 upgrade, the V4 will also offer an upgrade path for current intake owners.
- UPGRADED TURBO
I've received a lot of emails and messages about this, and yes, the project is still underway.
The prototype turbo has already been designed and we do have a one off. Once we confirmed the finished design, we started production on multiple units. This has been pending for months now. The problem has been sourcing materials (that aren't just cheap and Chinese). We have finally been able to get the materials to fabricate our wheels, but are waiting on them to arrive to finish our first run.
- TUNING
In the meantime, we have been working on a number of new tuning features, both in development work on tuning for the different turbo. This includes:
- manipulation of the LT coolant system
- changes to the DNA switch masking (due to the high demand for resolutions to the natural mode problem with MES and race mode, and just for simplicity sake). I'm attempting to implement the functions of a Race mode, but in Dynamic mode only (like ESC off, throttle response and take off, etc) I will not be able to do things with the display, that still resides in the BCM. I've had partial success, but there are some kinks still to work out. I would like to be able to provide this all through the tune alone, so I'm trying to code this to get it working 100%.
We also will have pics and more information on what we are doing with the 2.9L soon as there are some developments there as well.
This will involve a V1 and V2 intake system, in addition to re-tuning and new tuning features for that car as well (including downpipe optimization, pops and bangs, etc).
If you have any questions in regards to any of these items, please email us at tuning@eurocompulsion.net. Contacting us via email or social media is the best way to get direct information about what we are doing at anytime.