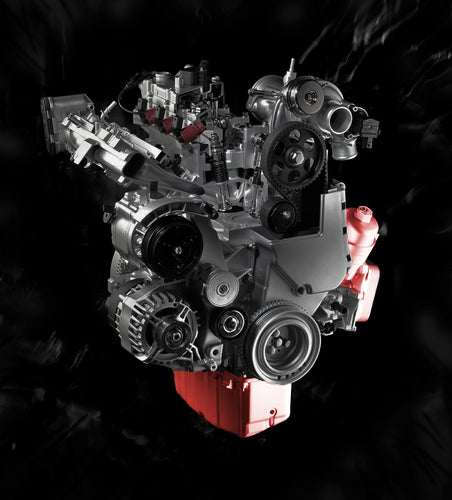
I originally wrote this article for the 500 Abarth, but everything in it is relevant to all the other cars with the same engine. This includes the 124, 500X, Renegade, Dart, MiTo and others. The engine may be oriented differently (124), and the oil pan and intakes may have variations, but essentially the procedure is the same.
Like all cars, your 1.4L Multiair Turbo needs fresh engine oil at semi-regular intervals. Exactly how often depends to an extent on your driving style, the engine's brain keeps track of this and when it decides it’s time for an oil change it will illuminate the “Generic Warning Light” on the dash. In case you don’t know what that is, it’s the amber light with an exclamation point inside of a triangle. The MAXIMUM period between oil changes is 8000 miles, or 6 months whichever comes first. However in almost all cases, the light will come on well before that.
Your 1.4L Multiair is tough on oil. It only holds 4 quarts. Yes, it’s a small engine, but it has the power of a larger engine, plus the turbo and MultiAir systems put extra demands on the oil. I suggest a maximum interval of 4000 miles or 6 months based on my experience with Italian cars and turbocharged engines.
So, it’s time to change the oil, let’s get to it!
In this article we will be changing oil the old fashioned way, meaning we will be draining it. I know the dealers, and many private individuals have pumps (called extractors) that will suck the oil out. This is faster and less messy than draining it. However in many cases, the old ways are still the best ways. Draining the oil gets a little more out, more importantly it gets the oil out at the bottom of the pan which is where sludge, water and debris tends to accumulate.
So, let’s get started. You are going to need to jack the car up. If you are in any way unsure about how to do this, see our tech article on the subject.
Once the car is up, we will need to get access to the drain plug. That means removing the plastic shield that covers up the bottom of the engine compartment. The shield is held on by six 10mm bolts.
OK, I know the picture below is crappy, but the bolts are easy to find so it shouldn’t be a problem. (note, this is on a 500, but it's largely the same on every other car with a Fiat 1.4 turbo.)

Once you get those bolts off, put them in a safe place. Do the same with the shield. This shield is important. It keeps dirt out of the engine bay, it improves aerodynamics, and most importantly, it’s ensures proper airflow through the engine bay for cooling!
Now, if you are one of the fortunate few who have a Skidplate from Eurocompulsion, draining the oil is a lot easier. You don’t need to remove anything to gain access to the drain plug.

Once off, find the oil pan drain plug. It’s easy, but I included a picture anyway.
The drain plug is 13mm.

Ok, you are going to need a 13mm wrench, I used a socket with an extension. Place a drain pan under the car, and remove the bolt!

It’s about this time that you will find the oil drains, not straight down and into the oil pan, but onto the crossmember seen in the picture above. This is feature of the brilliant Fiat engineering; it insures that this critical cross member NEVER rusts out. Just kidding of course. Wipe the oil off the crossmember when you clean things up. (note: with our skidplate you can avoid this mess by shoving a piece of cardboard or some folded up newspaper into the rectangular cutout out to force the oil to drain down and straight out into the drain pan.
Give the car about 10 minutes to let all the oil drain out. While you wait, you can jump ahead and start removing the oil filter as described below. I should point out that the car needs to be level, or with the front end higher to insure you get as much out as possible. Once all the oil is out, put the bolt back in, and bolt the plastic shield back on. If you have someone else change the oil, make sure they put that cover back on with all six bolts! This is an easy place to take a shortcut; a lot of mechanics tend to do that.
Now it’s time to change the oil filter.
We begin by removing the air intake pipe that connects the air filter box to the turbo’s inlet. In this case, I will assume you have a stock intake, although if you have an upgraded intake, the procedure is about the same.
Loosen the two clamps, and disconnect the two hoses

Loosening the two clamps is pretty simple. The larger of the two hoses is a squeeze to disconnect type. You squeeze the grey tab and it pulls right off. The other hose will require pliers to remove the clamp. This smaller hose is a critical hose, don’t damage it!
Once the intake pipe is removed, look down and see the filter housing.

Ok, some genius decided to make the filter housing out of plastic or some kind of composite. It’s probably pretty tough, but be careful here. Eventually somebody is going to crack one of these things, or damage the threads by cross threading it when putting it back on. Work slowly and carefully with this thing. This is another reason I think it’s good to do this yourself.
You are going to need a 27mm socket. Worse, the angle is such that without a universal joint and an extension, it’s going to be tough to get a good angle to remove this thing.
My 27mm socket and universal joint in action!

One you loosen the filter, you can easily remove it by hand. As you pull it up and out, it will tend to drip oil over everything so have a rag handy. As soon as you raise the filter, put the rag underneath. That will save a lot of clean up later. If you don’t do this, you will never be able to clean up all the drips, they go into places you just can’t reach.
The oil filter itself simply snaps into the housing from the bottom. This is handy because you don’t need to try and hold the filter and housing at the same time as you put it back in.

Pull the old filter out of the housing, it just pulls straight out. It will come out with a snap. Clean the housing up. Replace the O-ring that seals the housing, and snap in the new filter. The new O-ring will be in the box with the filter, they are always sold together. When you buy a new filter it’s a good idea to make sure that part is in the box before you leave.
The cap says 27NM on it. That’s the torque spec in metric newton-meters. Some people think that metric system is going to catch on one day. For the rest of us, it means 20 pound feet of torque. Or you could just tighten it until it feels right, like just about everyone is going to anyway. Just don’t overdo it and strip the threads, or crack the dang thing.
Now add your four quarts of oil. Use full synthetic 5-40. Currently, the dealers supply Penzoil. As I have no way to test every brand of oil, or keep up with the nearly constant changes in formulas, I have no way of knowing if that’s really the best stuff. There are various websites that review oils, but have they tested this month’s formulas? Probably not. I think what brand you use is far less important than how often you change it as all the major brands full have full synthetics and meet the required specifications. However, at least for the time being, I am sticking with the official stuff, and that’s Penzoil full synthetic 5-40.
OK, did we really need this next picture? Just in case you don’t know where to add the new oil, it goes in here.

Remove the cap, pour in the four quarts of oil, and replace the cap.
Put the intake pipe back on, double check everything. Take a look under the car and make sure oil isn’t draining straight out onto the floor because you forgot the drain plug. Make sure all your tools are out of the engine bay and get into the car.
Now it’s time to reset that oil change reminder. Turn on the ignition (meaning ON, but DON’T start the engine). Press the accelerator pedal to the floor and release it three times within 10 seconds. Now turn off the ignition. Now start the car and watch the dash lights. The red oil pressure light should go out within a few seconds of starting. If not something is really wrong, like your forgot to put in the oil, or left the drainplug out. The oil change message and associated “Generic Warning Light” should be out. If not, reset it again.
Next, get out of the car and check for leaks, smoke or anything else that seems wrong. If everything is OK, and it should be, good job! Enjoy the next 4000 miles of 1.4L Multiair Turbo action.

