
- Start the car, turn the steering wheel all the way to the right and shut the car off.

- Disconnect the battery's negative terminal.

- Gain access to the driver's side of the intercooler by removing the fasteners on the forward driver's side splash shield. There is one at the bottom that's a screw type, not a pop out like the others you can see here.

- Pull back the splash shield and locate the boost sensor which is attached to the intercooler's cold side outlet

Let's take a closer look at the boost sensor. There is a white tab at the top which has to be pulled back. Then squeeze the tab and pull the connector off of the sensor. Don't pull on the wires too much, you don't want to damage anything here.
Note, it's also possible to get at this from the top through the engine compartment, or from the bottom by taking off the under car plastic shielding, but I find this through the fender method the easiest and quickest.

-
Take the Main Wiring Harness, that's the one with all the plastic connectors on it and find the end with two three wire connectors. Those will need to be fished through the engine compartment down in the area where the boost sensor is located.
There is probably more than one way to do this, but take a good look at the picture below to see where I put them through. This will insure you have enough length of wire for everything to work out. This is the driver's side forward corner of the engine bay. You can see the radiator and plastic intake tube to get yourself oriented.

- Now we're having fun. This is probably the hardest step in the installation. Connect the factory connector you took off the boost sensor to the female connector on the new wiring harness. Connect the male connector to the boost sensor. Make sure both locking tabs are clicked back into place. In theory, it should be impossible to connect these incorrectly so if the connector isn't going on, it's either the wrong one, or it's upside down. Take your time here and get it right.

- Back up to the engine compartment and locate the Manifold Absolute Pressure sensor. It's on the driver's side of the car attached to the intake manifold.

- Connect main wiring harness to MAP sensor. There are two four wire connectors here, one goes to the sensor, the other goes to the factory plug that your removed exactly as with the other sensor we connected to, in theory you can't really screw this up, it should be impossible to connect these incorrectly, but these days nothing surprises me. I suppose with enough force anything is possible.

- Locate the Fuse Box and remove the cover.

- You need to find a fuse that is only getting power when the ignition is on. You can find that with a test light. However as of March 2025 All S650 EcoBoost Mustangs have the same fuse box so you can use fuse number 21, which is a 10 amp fuse located here:

- Pull the fuse, install it into the unused spot on the plug and then insert the connector into the fuse box in the location where you just pulled the fuse. The next two pictures will clarify this.


- Put the fusebox cover back on. I like to file a little slot for the wire. You don't need to do this, you can scrunch it down, or you can use another power source if desired. This is just the way I do it, which I do think is the best way.

- Attach Ground wire here. This is near the fuse box and is a convenient spot.

- Route the power and ground wires you just hooked up across the engine bay to the driver's side rear corner. Use zip ties to make sure they can't touch anything they shouldn't like the turbo or exhaust.

- Connect the power and ground wire to the connection on the Power Boost Module. Then Connect the big connector from the main wiring harness to the module.

- Attach the Module with Velcro

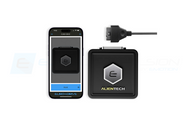
How to use the Eurocompulsion Power Booster 2.0
The module has four settings. OFF, Street, Sport and Race.
Off returns the car to stock settings.
Street, provides the lowest level of performance and although we strongly suggest 91 octane (R+M)/2 fuel, this setting should be fine with 87.
Sport increases the power a little bit more.
Race is the highest power map on the device.
Normally these will be selected via the Remote control from in the car. You can mount the remote on the dash, or just leave it in the glove box.
Simply press the button on the remote control for the desired mode. If you hold the RACE button down for over 3 seconds it turns the module off and reverts to stock settings. The remote has a tiny light in the upper right corner which illuminates when you select a mode. This is important. The light illuminates when you RELEASE the button, which mean that the signal was sent for the change.

The module itself has colored lights so you can visually verify the mode and the functioning of the remote, which you should do after installation.
When you select Street mode a Blue light will illuminate on the module. Note the blue light is hard to see at anything other than just the right angle.
With Sport mode selected you will have red and blue lights.

In Race mode you will have a solid red light.

The modes can be selected on the module itself if the remote is lost, damaged or needs a battery. Simply press the mode change button until you see the light for the mode you want. The other button shuts off the module if held down but should not normally be used. If you want to shut it off, it's best to do that either through the remote or by installing the bypass plug.